Do you ever use the portrait mode on your phone camera and think the blurry background doesn’t look quite right? Here’s why, and what to do about it!
Firstly, what is portrait mode?

If you’ve ever seen professional portraits or headshots taken with an SLR camera (like this one on the left), they often have a nice blurry background which makes the subject stand out.
This is called shallow depth of field.
Photographers use the aperture settings on the camera to ensure that only the subject is in sharp focus, while the rest is out of focus (also known as bokeh). The further away the background is the blurrier it becomes.
In portrait mode (or selective focus), a phone camera tries to replicate this effect by analysing the depth of a scene and blurring what it determines is the background, while keeping the subject in focus.
But it has its limitations! The phone is only creating the effect of depth of field and it can make mistakes and look unnatural. Here’s how to avoid that!
#1 Create Distance
Since the blur produced by a camera is created digitally rather than optically (ie. not through the lens) it doesn’t always do a great job at separating the background from the foreground. So if for example your subject is leaning against a wall the camera will struggle to distinguish between the two. You may find the edges of your model’s hair are blurry for example.
Moving your subject further away from the background makes it easier for the camera to differentiate and will help create a more natural looking out of focus effect.
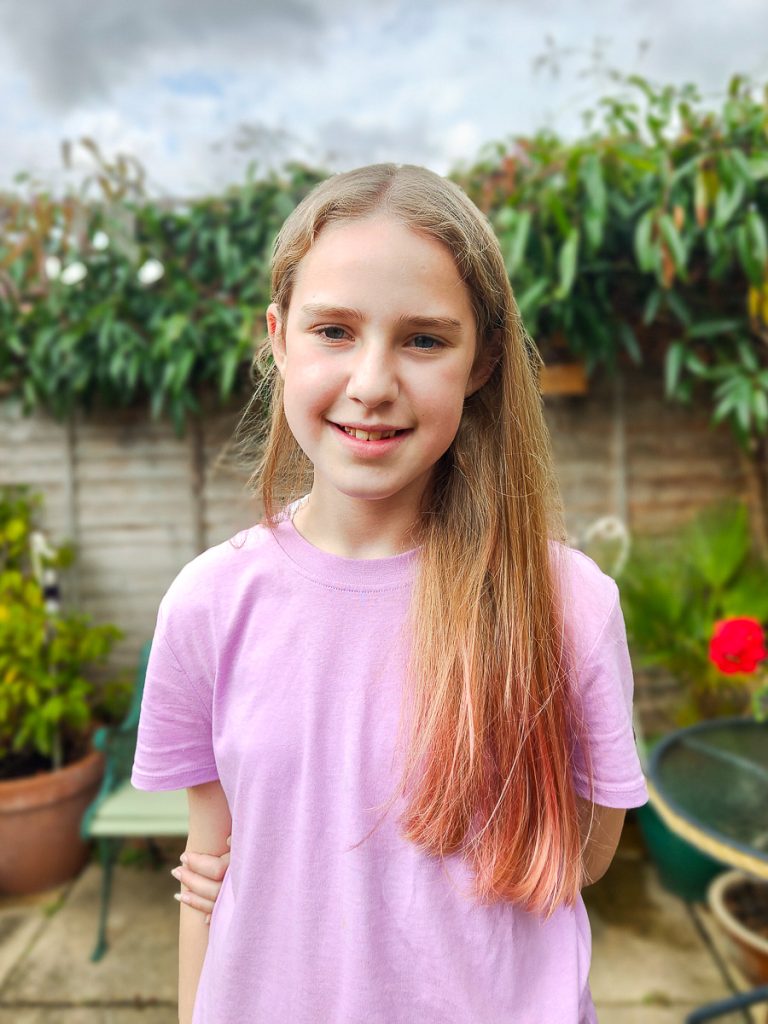
#2 Keep the background simple and at the same distance
In an optically produced shallow depth of field (ie through a camera lens) anything at the same distance from the camera as the subject will also be in focus – like the door frame the woman is leaning on in the photo above. And things gradually get more out of focus the further behind the subject they are.
However portrait mode on a phone camera doesn’t graduate the level of blur. It just distinguishes between the subject and the background, and blurs everything in the background the same amount.
So if your photo has things in the far distance as well as just behind the subject, they will all be blurred the same amount which can look unnatural.
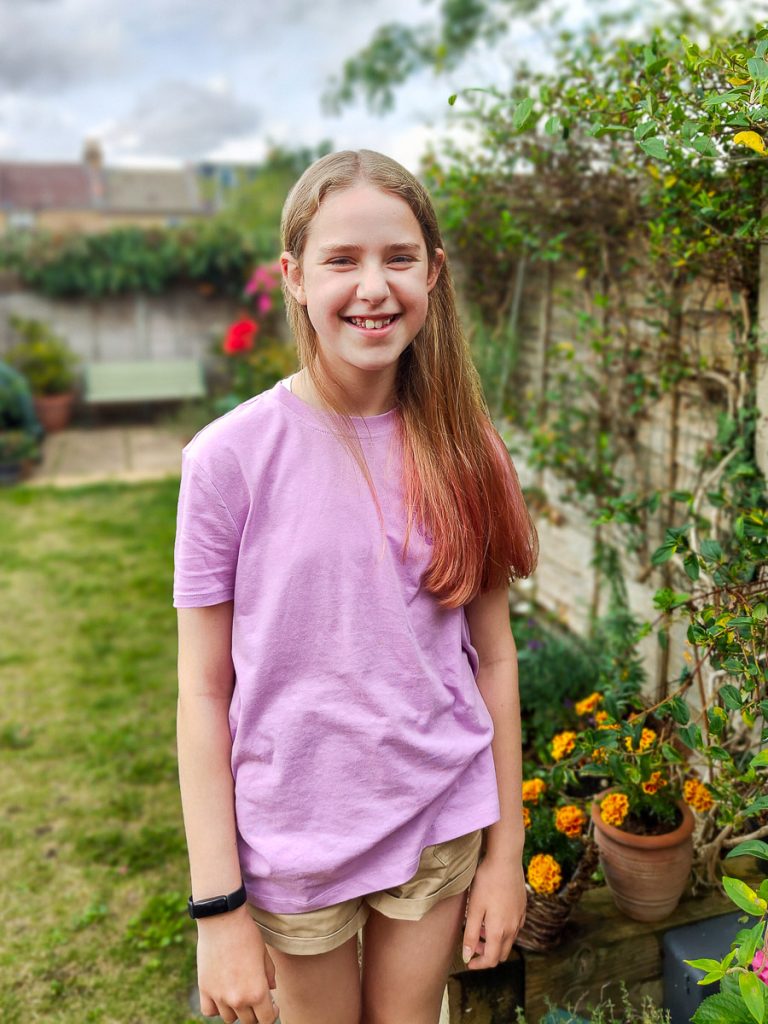
If you look at the first photo above, on the right hand side of the shot you can see that some of the greenery is sharp and some is blurry. This is where the phone camera has struggled to work out what to keep in focus and it just looks a bit odd.
In contrast, the image on the right has a simpler background all pretty much at the same distance from the subject. The camera does a better job of determining what to blur and it looks more natural.
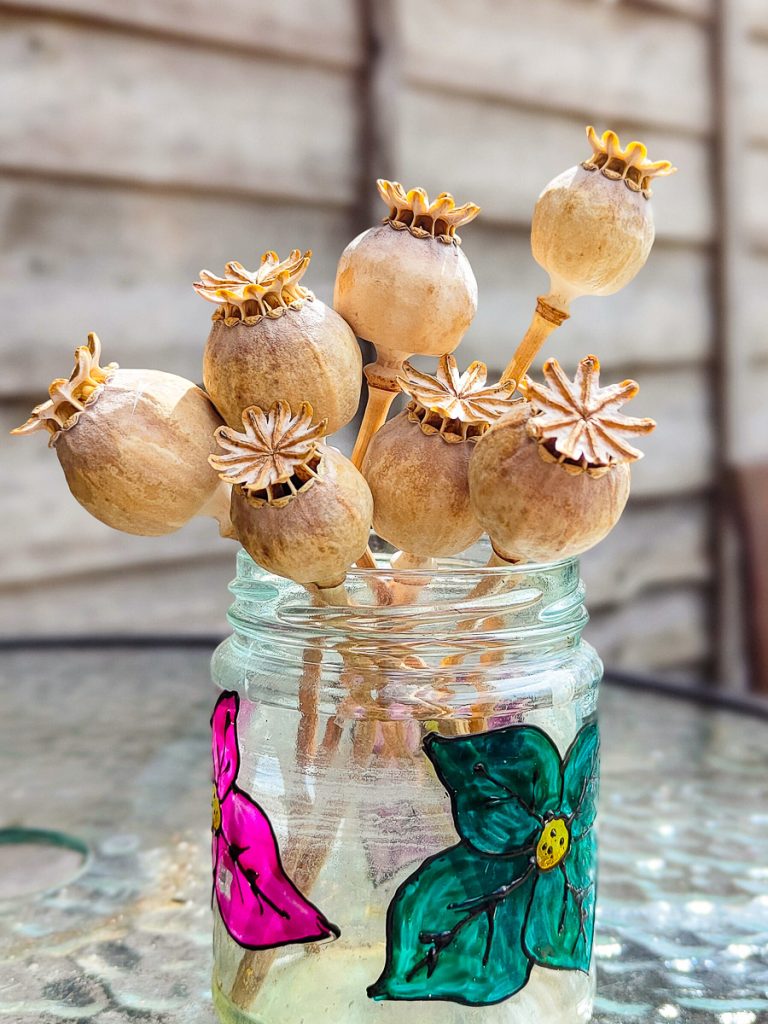
#3 Don’t stand too close
Keeping some distance between the camera and your subject will help the camera differentiate correctly between background and subject.
In this photo on the left, the phone camera was very close to the subject and you can see that it has blurred the seed pod on the right hand side and some of the jar. In the second picture, I held the camera further away and it has done a better job of keeping all the subject in focus while blurring the background.
I’ve just cropped the second photo to make it look more like a close-up.