There are lots of things that make a great interiors shot but composition and light are probably the most important things you need to think about if you’re photographing an inside space. This article is about composition and the three types of interiors photos you should focus on.
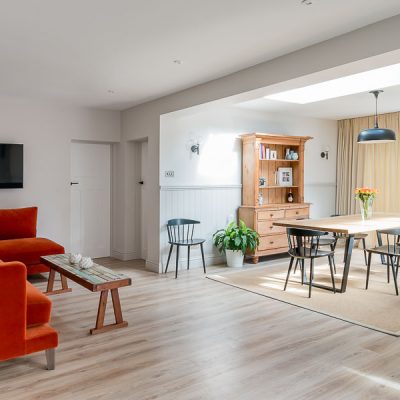
#1 The hero shot
This is the one main photo that will show off the whole space either on a website or social media, or in a magazine.
It’s the shot I always start with and I’ll walk around the room looking at different angles, composition and available light to get the best possible photo.
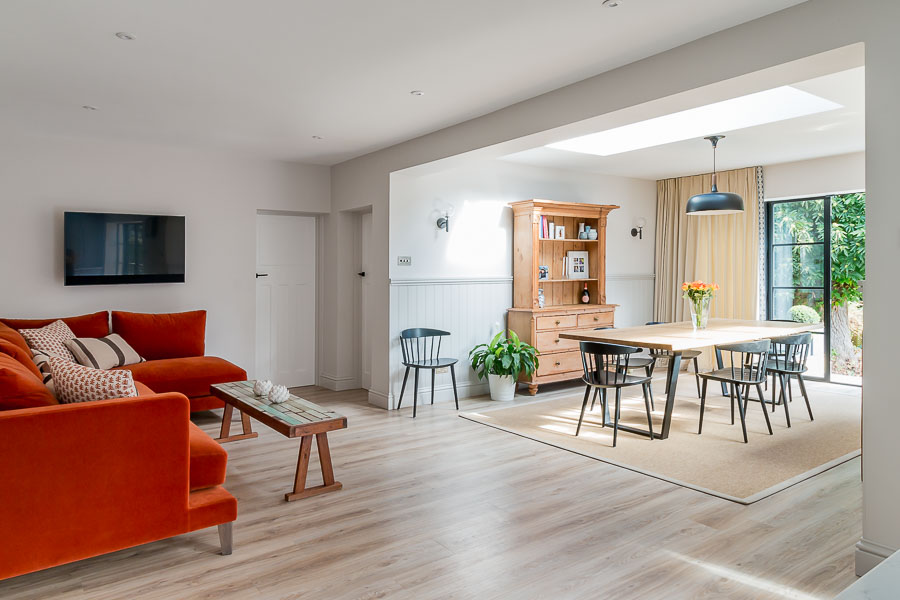
The interiors hero shot is usually a wide-angle photo and will show as much of the space as possible. Make sure it includes the most important parts of the room in terms of architectural features or furniture.
Once you’ve decided on the best angle, you may need to move furniture and accessories to create a more balanced photo. Also make sure there are no ‘barriers’ between the viewer and the room. You want people’s eyes to be drawn into the picture and anything in the way will stop them doing this.
There is usually only one hero shot but if the space is particularly large there may be two or even three different hero shots showing alternative aspects.
Be careful if you’re using a wide angle lens – go too wide and you’ll start to see distortion around the edges, and the walls and door frames may end up looking curved! And don’t forget to make sure the horizontal and vertical lines are straight.
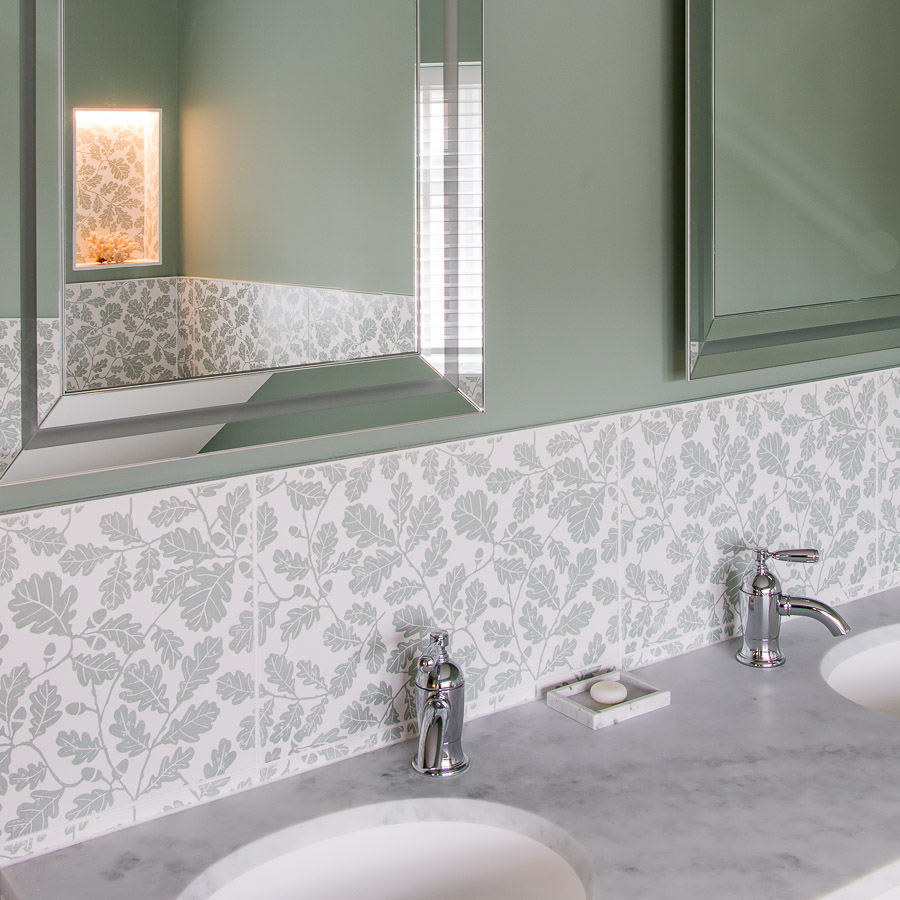
#2 The navigator
When people look at a series of photos of a room or house, they will mentally try to piece them all together to get a better idea of the layout. You can help by using ‘navigator’ shots to guide viewers through the space.

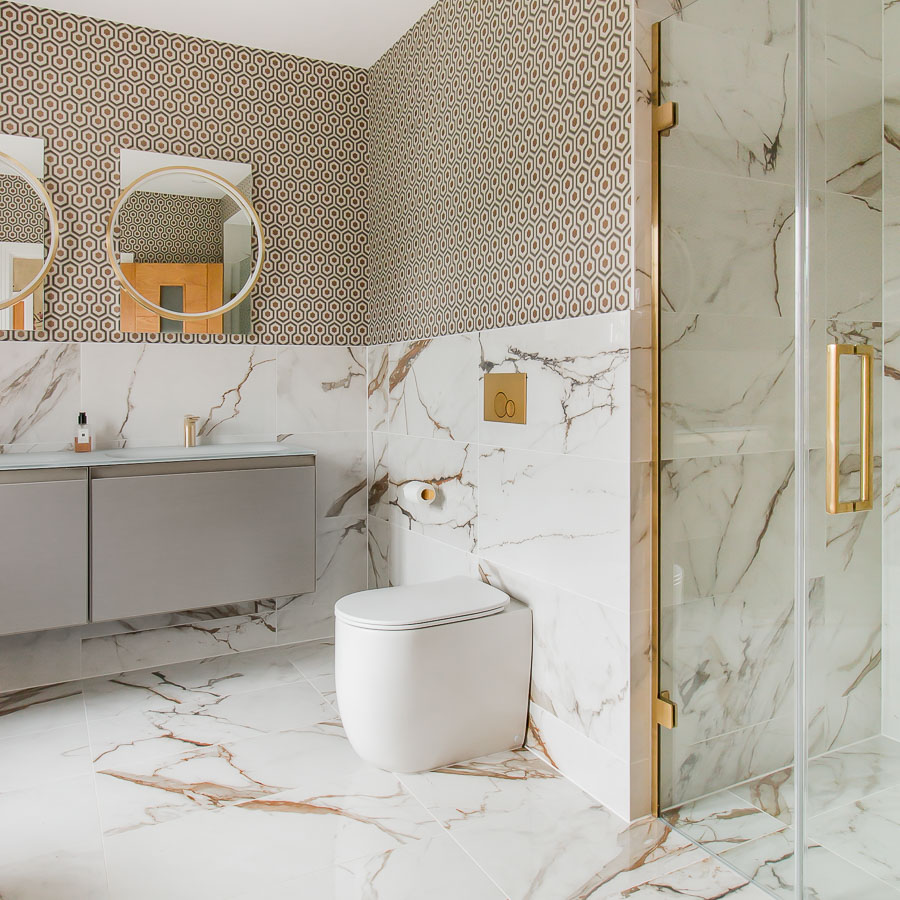
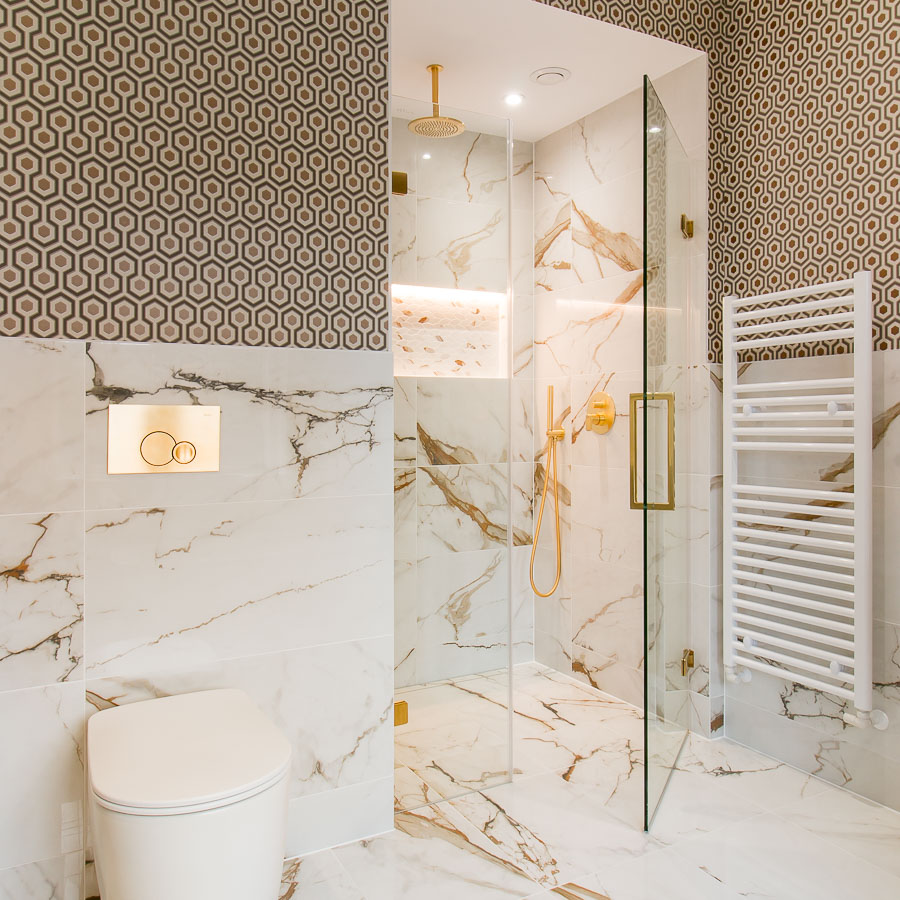
It works well if there is a point of reference from one photo to the next. Include something like a door or piece of furniture in a photo and make sure it also appears in the next shot, so viewers can ‘follow you’ around the space.
You could use something unfixed that you can reposition slightly between photos, or in this example I’ve used the toilet as a reference point between shots to help viewers mentally map out the room.
#3 The detail
These are the photos that bring out the ‘personality’ of the space. It’s where you can show off the different design elements and highlight special features. Think colour, texture and light.
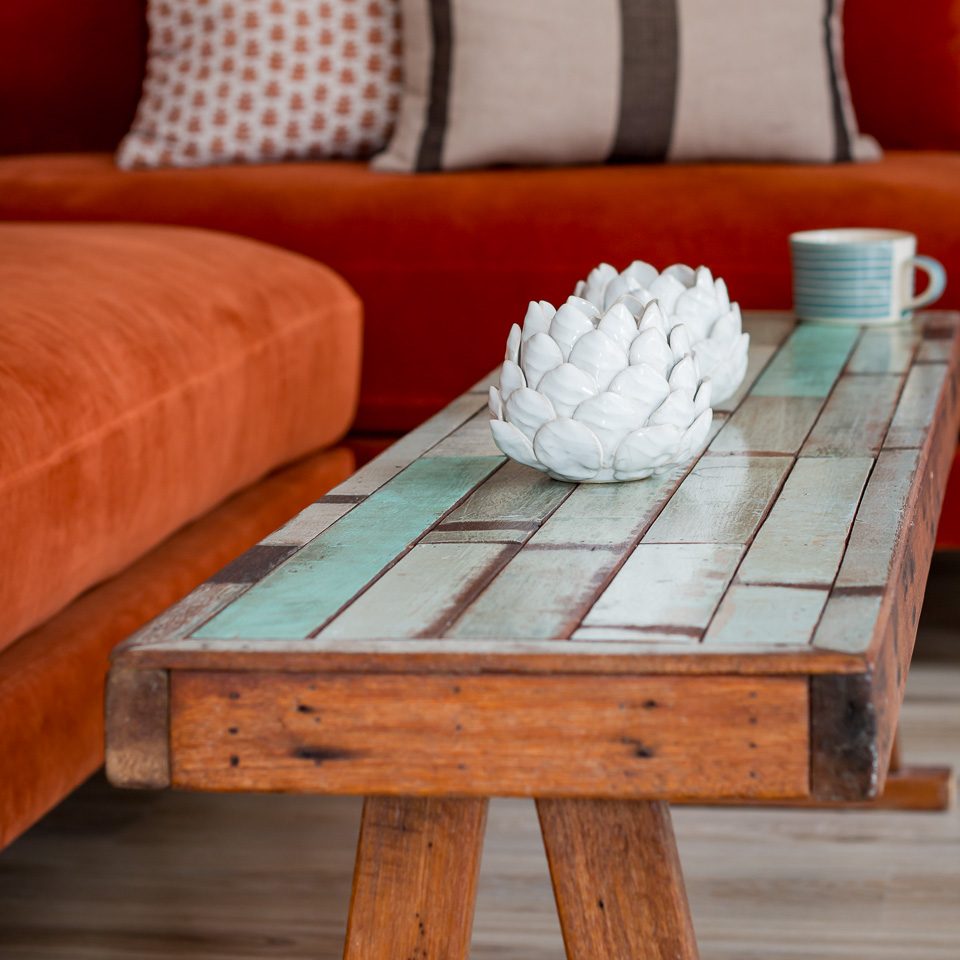
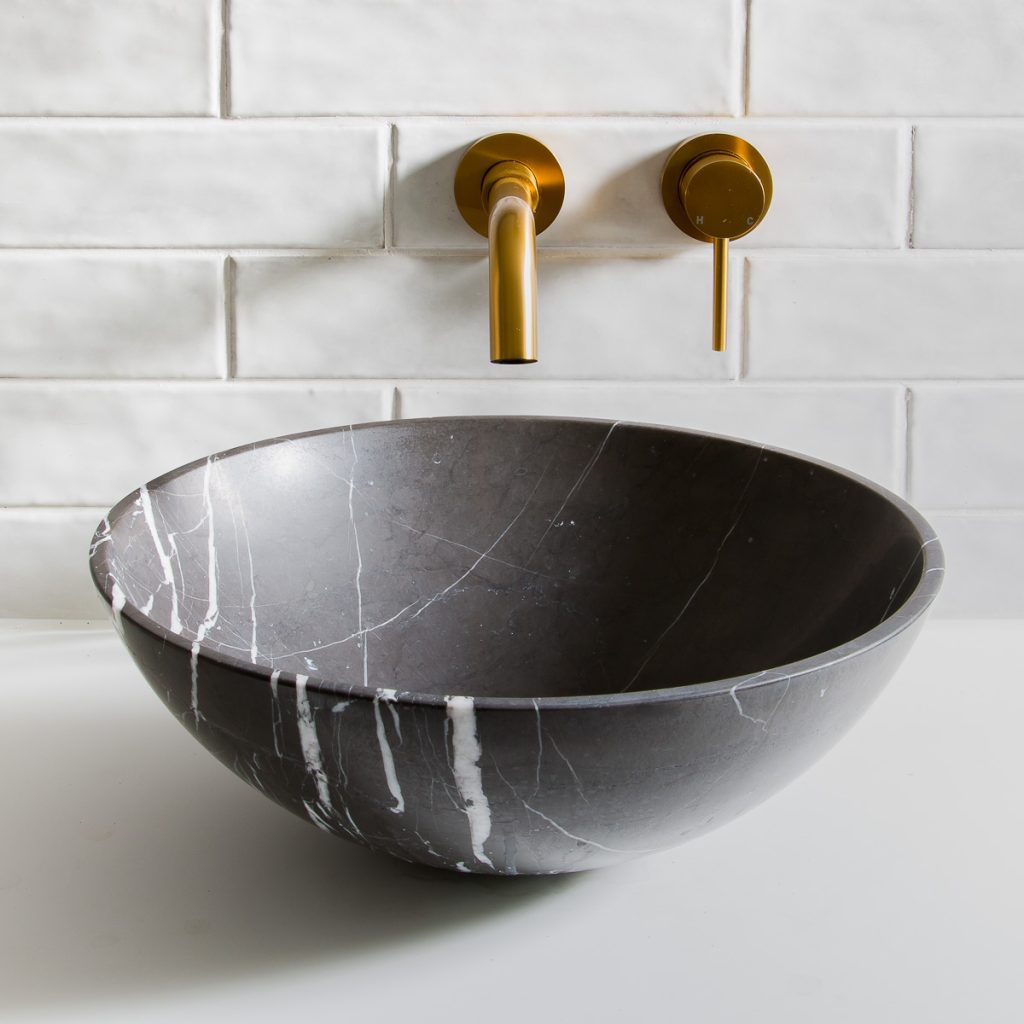
You could focus on an interesting surface, a stunning object or simply the reflection in a mirror. All the things that when put together create the overall style of the room and make it unique.
These three types of shots form the basis of my interiors photoshoots, and I approach them in the order I’ve outlined above. In summary:
Work out the best angle for the hero shot.
Take the viewer around the room with the navigator shots.
Finish with some close-up detail photos.
If you’d like to see more of my interiors photography you can take a look at my gallery here.
Or you can keep in touch, and receive advice and tips, by signing up to my emails below.
All photos are copyrighted to Michelle Richards Photography. The navigator shots and bathroom mirror were taken for The Bromley Bathroom Company, all the rest for Anna Patten Design.